


Getting Started – Basics
ZEISS INSPECT: Optical 3D User Interface

Getting Started – Basics
ZEISS INSPECT: Data import

Getting Started – Basics
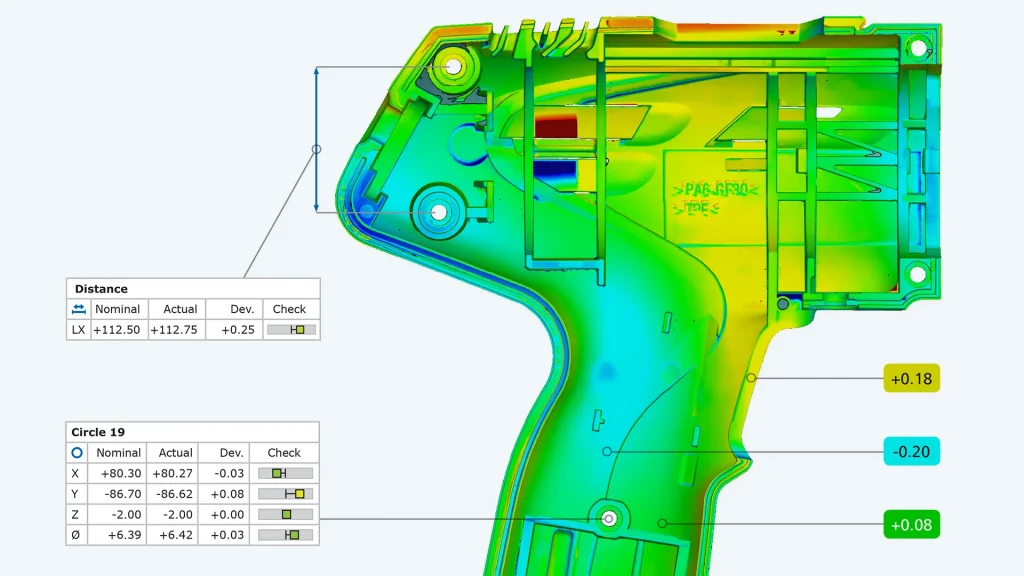
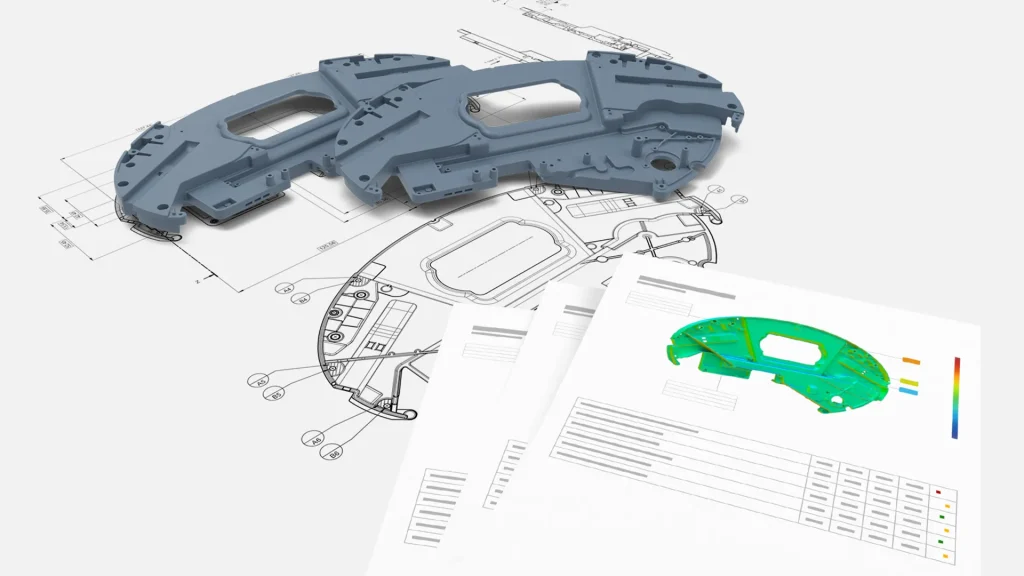
ZEISS INSPECT: Performing single inspection

Getting Started – Basics
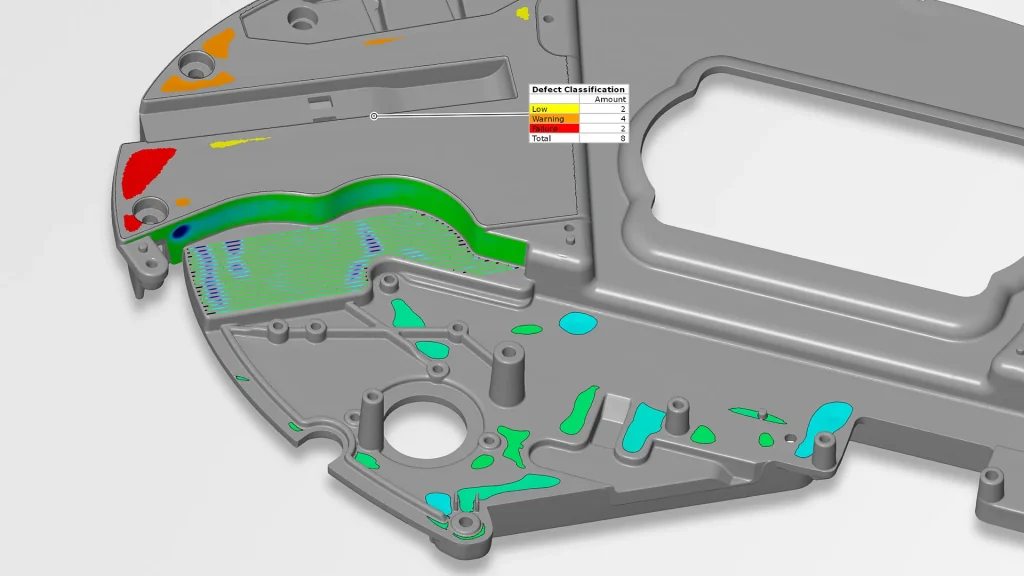
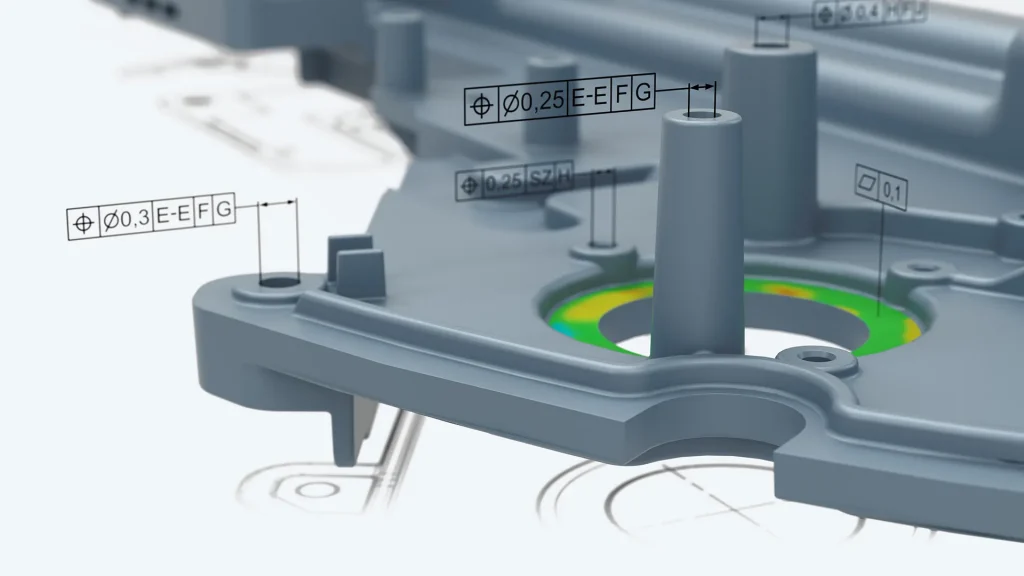
ZEISS INSPECT: Performing GD&T inspections

Getting Started – Basics